EAGLE FOR BEGINNERS
In my last post we had gone through a basic light triggering circuit Hope you are happy with your first "TechProject"now lets go one step ahead and we will learn the basics of a PCB designing software "EAGLE".After this you can actually design a circuit of your own and get rid of those messy SOLDER'S and WIRE'S and give your circuit a professional look.
Lets GET started
So Eagle is basically a software that can be used to design your PCB(printed circuit board) that can be latter printed either at home or can be printed at some pcb printing shop to get more professional and accurate.
STEPS:
- Download and install Eagle.eagle is not a free software but you can get the lite version for free which is sufficient as of now. you can get the eagle lite version at the below link: http://www.cadsoftusa.com/download-eagle/freeware/
- Open the eagle software,Following screen will appear on the desktop.


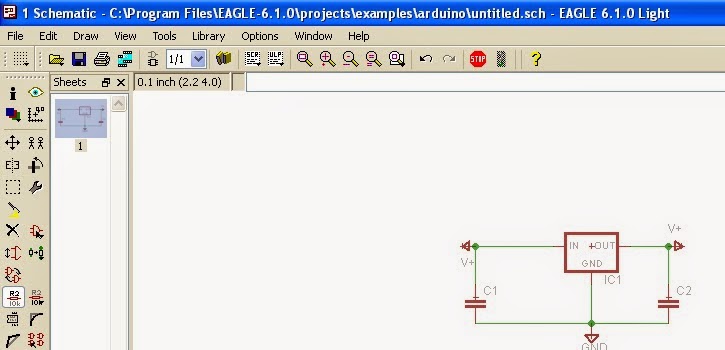
4. Then the following window will appear before you
The schematic is a place where you can add your components and then make the connections as you do normally in any simulation software or say as the circuits you make in your book.You can see a simple schematic of voltage regulator in the image.
5. COMMANDS:
Now lets look at the important commands that will be usefull while designing the schematic

- MOVE:
The move command is used to move the component in the schematic frame and arrange the components as required .It should be noted that the arrangement of componet in the schematic is not so important as the final arrangement is done in the board file only, the schematic is just for reference.
- ADDING COMPONETS IN THE SCHEMATIC:
 This command can be found in the tray on the left of the screen click this to add new componets ,Clicking ADD open the following window.
.bmp)
- WIRING UP:
 Now after adding the componets you need to wire them up you will see the LINE icon on the tray clicking it enable the wire and then using your mouse you can connect the wire between required terminals.
6. LOADING LIBRARIES:
Click on 'LIBRARY' tab and then 'USE' the select all the libraries and then add them .This needs to be done when you open Eagle for the first time.
- ADDING NEW LIBRARIES: Click on 'LIBRARY' then 'USE' you can then find the link of the lbr folder on your PC
- Place the dowloaded lbr file in this folder and then restart Eagle ,if required you may need to load the library for first time by following the procedure above.
THIS ARE THE BASIC COMMAND THAT YOU NEED TO NOW IF YOU ARE A BEGINNER IN EAGLE THEN THE REST CAN BE LEARNT AS YOU GO ON PRACTICING BY DESIGNING NEW CIRCUITS IN EAGLE .
Now you are ready to design your own circuit
HOPE THIS HELPS!!!!!!!!!!!!!!!!!!!
THANKYOU
No comments:
Post a Comment